I’ve spent over twenty years fixing backsplashes that looked great for three months and then started falling apart. Most of the time, the tile itself was fine – the installation wasn’t. These mistakes happen in DIY jobs and with inexperienced contractors, and they’re almost always avoidable.
Here’s what goes wrong most often and how to prevent it.
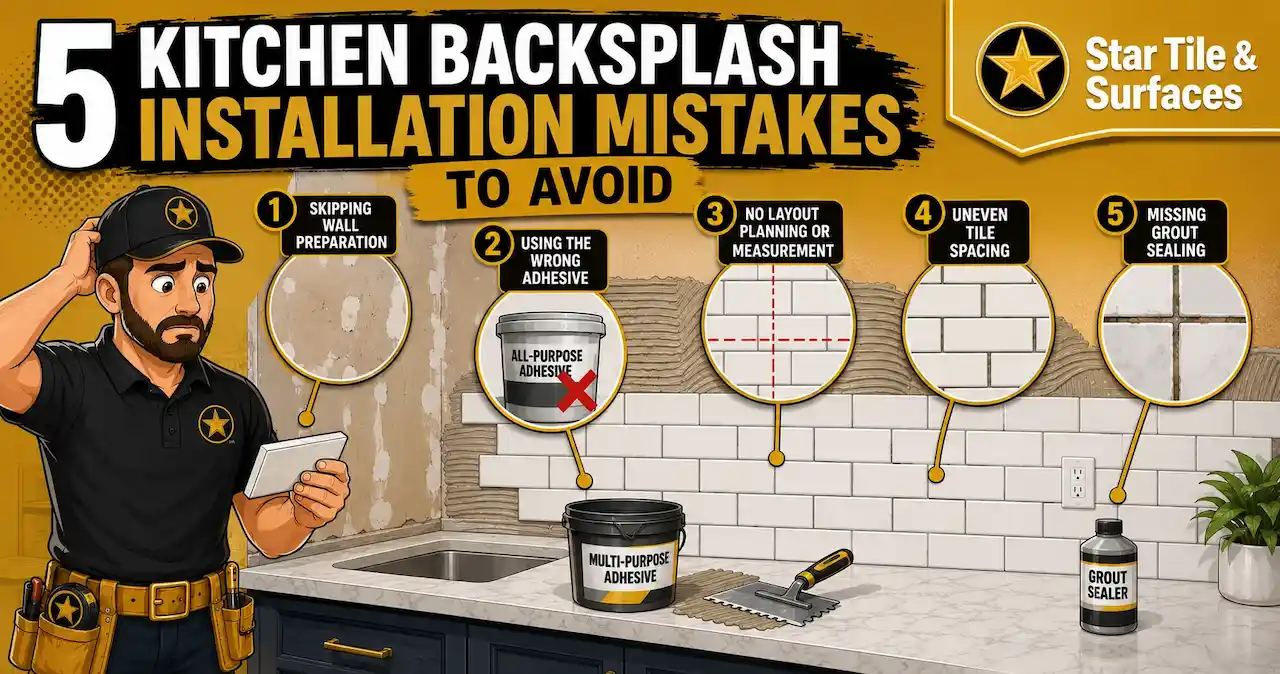
The 5 Most Common Backsplash Installation Mistakes
| Mistake | Why It Happens | Result |
|---|---|---|
| Skipping wall prep | Rushing to start the tile work | Tiles fall off within 6-12 months |
| Wrong adhesive choice | Using whatever’s at the hardware store | Tiles slip, crack, or delaminate |
| No layout planning | Starting installation without measuring | Awkward cuts, unbalanced pattern |
| Inconsistent thinset coverage | Not using proper trowel technique | Hollow tiles, lippage, cracking |
| Grouting too soon | Impatience or tight timeline | Grout cracks, tiles shift |
Skipping Proper Wall Prep
The wall matters more than the tile. If the surface isn’t clean, flat, and stable, nothing you do after that will save the job.
Drywall dust, grease from cooking, old paint – all of it prevents adhesive from bonding. I’ve pulled tiles off walls where the thinset was still stuck to the back of the tile but the drywall paper came with it. That’s a prep failure, not an adhesive failure.
Before any tile goes up, proper wall preparation means cleaning with TSP, repairing damaged drywall, and priming porous surfaces. It adds an hour to the job and saves you from a $2,000 redo.
Using the Wrong Adhesive
Not all thinset is the same. Standard thinset works for most ceramic, but natural stone needs white thinset to avoid bleed-through. Glass tile needs a non-sag adhesive rated for glass. Large-format porcelain needs a modified thinset with higher bond strength.
I see homeowners buy pre-mixed mastic because it’s easy to spread. Mastic fails in wet areas and doesn’t bond well to non-porous tile. If you’re installing stone, porcelain, or anything larger than 8×8 inches, use the right thinset for the material.
When tiles start coming loose months later, fixing them costs more than using the correct product upfront.
Not Planning the Layout First
Starting in the corner and hoping it works out is a gamble. You usually lose.
I always dry-lay the tile or at least measure and mark centerlines before mixing any thinset. The goal is to avoid tiny slivers at outlets, cabinet edges, and corners. A balanced layout means centered focal points and cuts that don’t look like afterthoughts.
This takes fifteen minutes with a tape measure and a pencil. Skipping it guarantees you’ll end up with a half-inch sliver next to the range hood that cracks the first time someone bumps it.
Inconsistent Thinset Coverage
This is the mistake I see most often, even from contractors who should know better. Thinset has to cover at least 95% of the back of each tile. Anything less and you get voids, which lead to cracking under normal use.
The right trowel size matters. For most kitchen backsplash tile, a 1/4-inch square-notch trowel works. For tiles larger than 12 inches, you need a bigger notch. You also need to back-butter large tiles to ensure full coverage.
When I pull off a failed tile and see thinset only on the corners, that’s a coverage issue. It’s also the reason tiles develop hollow sounds or lippage.
Grouting Before the Adhesive Cures
Thinset needs time to set up. For most products, that’s 24 hours minimum. Grouting too early puts weight and movement on tiles that aren’t fully bonded yet.
I’ve had clients push to finish faster because they’re hosting a party or staging a home sale. Grouting at twelve hours instead of twenty-four might save half a day, but it risks shifting the tile and cracking the grout within weeks.
If you’re hiring a pro who promises a one-day installation from demo to grout, walk away. It’s not physically possible to do it right that fast.
When to Hire a Pro and When Not To
If you’ve done tile before, have the right tools, and are working on a small backsplash with basic subway tile, DIY is fine. Be honest about your skill level and budget extra time.
If you’re dealing with natural stone, large-format porcelain, intricate patterns, or anything involving outlets and appliances, hire someone with experience. The margin for error is smaller, and fixes cost more than the install.
Frequently Asked Questions
How long should I wait before grouting a backsplash?
At least 24 hours after tile installation, longer if you’re in a humid climate or working in winter. The thinset package will list the cure time – follow it.
Can I tile over existing tile on a kitchen backsplash?
Technically yes, but only if the existing tile is perfectly flat, well-bonded, and you rough up the surface for better adhesion. Most of the time it’s smarter to remove the old tile and start fresh.
Why do my backsplash tiles have uneven edges?
That’s lippage, usually caused by inconsistent thinset coverage or not using spacers. It can also happen if the wall itself isn’t flat and the installer didn’t correct for it.
Do I need to seal my backsplash grout?
Yes, especially in a kitchen where grease and moisture are constant. Seal grout 48-72 hours after installation, then reseal annually. Natural stone also needs sealing.
Ready to get started in Plano?
Star Tile & Surfaces is here to help with kitchen backsplash installation mistakes in Plano. Reach out today and we’ll walk you through your options, answer your questions, and book a time that works for you.
Call (214) 605-0050 or visit Star Tile & Surfaces to schedule your Plano appointment.